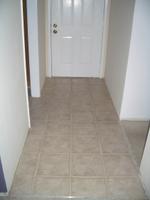
Woo hoo, Tile Day had arrived! First and foremost, I would like to thank my wonderful friends, Paula and Alex, for helping me out with this project. Especially Alex since he pretty much did all the work - Paula and I were his assistants but we were helpful too. I definitely couldn't have done it without you guys. I'd also like to thank my friend (and soon-to-be co-worker) Alan, who thought he was just visiting San Jose for a fun new hire event but got roped into "volunteering" to help out. We started bright and early at 7:30am on Saturday morning. Yes, you read that correctly, 7:30am. First, we had to finish ripping out the the plywood backerboard in the kitchen and pull up all remaining staples. That took us about 2 hours. I'm surprised I didn't find any hate letters taped to my door from angry neighbors, we were so loud. I learned that I really like the "cat's paw"-a tool that was quite useful in pulling out the staples and very fun to use. I thought about buying one for myself, but I just didn't think I'd put it to good use. I mean, how many times will I need to pull out staples that are nailed to the floor?


Once the floor was cleaned up and ready to go, we nailed down the backerboard and Alex determined the appropriate tile lay out.


Then it was time to cut the tile (thanks, Patrick for letting me borrow your saw!!) and mix the mortar adhesive stuff. We ended up using "speedy set" which dries in an hour versus regular mortar which takes 24 hours. That meant that we (or rather, Alex) would have to work fast otherwise it would dry up and we wouldn't be able to to move the tile if it was crooked. I wouldn't recommend using speedy set unless you absolutely have to. It was rather stressful.


After the tile was set, we started applying grout. This was a pretty messy process. I felt like I was a kid playing in the mud.


Doesn't it look like fun!?
After a long day of work and only several trips to HD, I finally had a brand new floor. It was so worth it! Here are the before and after pics:


 I think I can see the light at the end of the tunnel!! My place is somewhat taking the shape of an actual home instead of a never-ending construction site. The living room is finally in decent condition. It's such a good feeling being able to come home and not worry about tripping over one of the many tools lying around on the floor. Did you know that you can find some really good home decor items on overstock.com? It's my new favorite online shopping site. I do feel bad for kicking Jeff's old couch out (sorry, Jeff), but at least we have a garage to store it in. By the way, if you know anyone who is looking for a couch and/or coffee table, let us now! The place is definitely coming together. What do you know...I may be even be able to have friends over soon. :)


